
Pumpkin on Clocktower
It's a pumpkin on a tower—on a pumpkin! What could be more meta?
(pdf, 867 KB)
Happy Halloween! These Cornell-themed pumpkin carving stencils are for Cornellians of all ages to download. Just print and carve! Detailed instructions are on page 2 of each download.
Share a photo of your creation on social media with the hashtag #CornellPumpkin. Happy carving!

It's a pumpkin on a tower—on a pumpkin! What could be more meta?
(pdf, 867 KB)

This homage to Cornell's Wilder Brain Collection will really get in your head.
(pdf, 665 KB)

Every October, the McGraw Tower clock face sports a pumpkin overlay—and now you can carve one of your own!
(pdf, 651 KB)


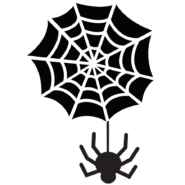
Celebrate Halloween with a pumpkin stencil inspired by Charlotte's Web, by E.B. White, Class of 1921.
(pdf, 565 KB)


Instead of a pumpkin on the tower, here's a tower to put on your pumpkin.
(pdf, 494 KB)

For our skilled pumpkin carvers, Touchdown is a challenging choice.
(pdf, 497 KB)

The sundial on the Engineering Quad isn't just a beloved campus fixture—it's one of the most accurate instruments of its kind on the planet.
(pdf, 353 KB)
It's custom to cut a hole at the top of your pumpkin before cleaning out the guts and carving it. Wait! Removing the stem of any fruit or vegetable will cut its life short. Your pumpkin will keep fresh much longer if you cut the bottom or back of the pumpkin. Not only does this keep the stem intact, but moisture also can’t collect on the bottom causing a quicker rot.
Use a large spoon or ice cream scoop to remove the guts and seeds. Scrape the sides to remove as much of the soft walls of the pumpkin as possible. Then, clean the inside with a solution of 1-tablespoon bleach and 1-quart water. Bleach kills bacteria helping to stave off mold and rot.
Cleaning your pumpkin is hard work. Take a break and let it dry inside before carving your design. Don’t set your pumpkin outside to dry. The elements could make it decay quicker. Speed up the drying process with a towel or a fan set to a low speed. Leave your pumpkin in a cool, dry space. Don’t use a blow dryer. Heat will speed bring on the rotting process.
After carving, put petroleum jelly on the carved edges and the inside of your pumpkin. This will keep it moisturized ensuring the pumpkin stays fresh longer. Vaseline alternatives include: vegetable or olive oil, clear spray paint, and white glue.
If your pumpkin has begun to shrivel, soak it in an ice water bath. Submerge your pumpkin in ice-cold water for up to two hours. You can add a small amount of bleach to the water to defend against mold. After the bath and before going back on display, apply moisture to the edges and inside using petroleum jelly or oil.